Progressive rock, jazz, and fusion bands all feature complex grooves as part of their identity. If you’re not a drummer, it can be hard to find exercises that train these skills. This lesson will walk you through 7 steps to improve your sense of rhythm and timing. Along the way, you’ll find yourself encountering the deep complexities of polymeter, polyrhythm, and the versatile 12/8 time signature. These are all important skills to master if you want to eventually perform metric modulations accurately.
We’ll be practicing these exercises with our hands, voice, and guitar. If you play keys, consider replacing the “foot tap” in each of these drills with a left-hand bass note, while the remaining rhythms can be played higher up with the right hand (as either chords or arpeggios).
You don’t need a metronome for this lesson right away. Practicing to a metronome is great, but it can be impossible if your body and brain don’t fully understand what you’re trying to play. A better option is to first synchronize your entire self to your instrument and your voice – then take those skills and try to sync them up to a metronome.

Step 1: Feeling 6/8 vs 3/4
Play 6 steady notes on the guitar – I recommend an open but palm muted E string.
Tap your foot every 3 notes and count out loud “1 2 3 1 2 3.” After doing that four times, start tapping your foot every two notes and count “1 2 1 2 1 2.” Do this four times and then switch back.
Here’s what that looks like on guitar tab and a music staff. Notice in the first measure how the notes are beamed together, into threes. Compare this to the second measure, where the notes are beamed into pairs. You’ll often see notes get beamed in different ways depending on what the underlying pulse is.

What you’re experiencing here is the difference between the most simple examples of 6/8 and 3/4 time signature. They both hold the same amount of beats, but 6/8 is usually grouped as two groupings of three, whereas 3/4 is usually grouped as three groupings of two.
Step 2: Groups of Three in 6/8 and 3/4
Here’s a six-note pattern that is clearly grouped into threes. We’ll practice this while switching our foot taps like we just learned. Pay close attention to how the same exact pattern feels different when the underlying pulse of your foot tap changes.

We’ll also practice this groove by counting out loud and clapping our hands. Try counting “1-2-3-1-2-3″ while clapping your hands on the 1s. Then keep your counting the same, but clap every two like this:
“1 – 2 – 3 – 1 – 2 – 3″
Step 3: Groups of Two in 6/8 and 3/4
Here’s a six-note pattern that is clearly grouped into twos. We’ll practice this while switching our foot taps like we just learned.
Now try counting “1 – 2 – 1 – 2 – 1 – 2″ and clap your hands on every “1”. Switch to clapping every third note like this:
“1 – 2 – 1 – 2 – 1 – 2″
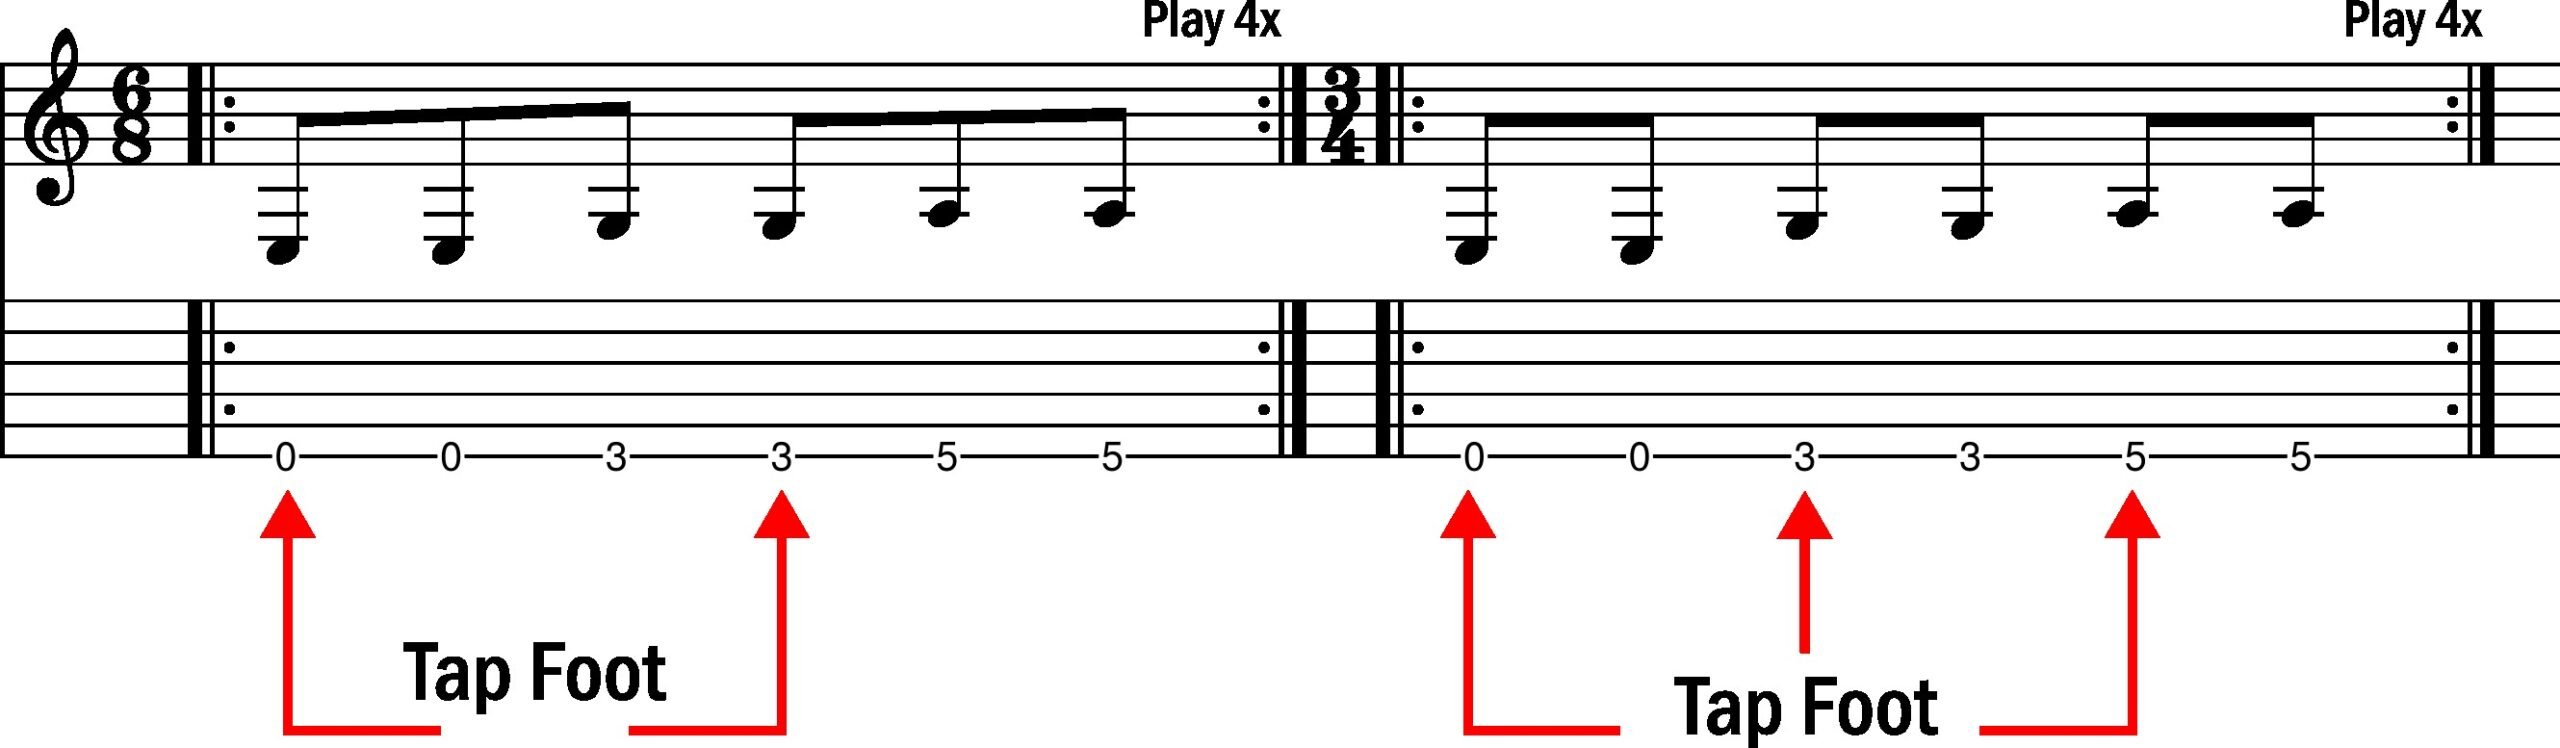
Step 4: Feeling 3/4 vs 12/8
Let’s play a string of 12 steady notes on a palm muted note, but tap our foot on every third note while counting “1 2 3 1 2 3 1 2 3 1 2 3”.
Once that’s comfortable, try switching so that foot taps every four notes, and count “1 2 3 4 1 2 3 4 1 2 3 4”.
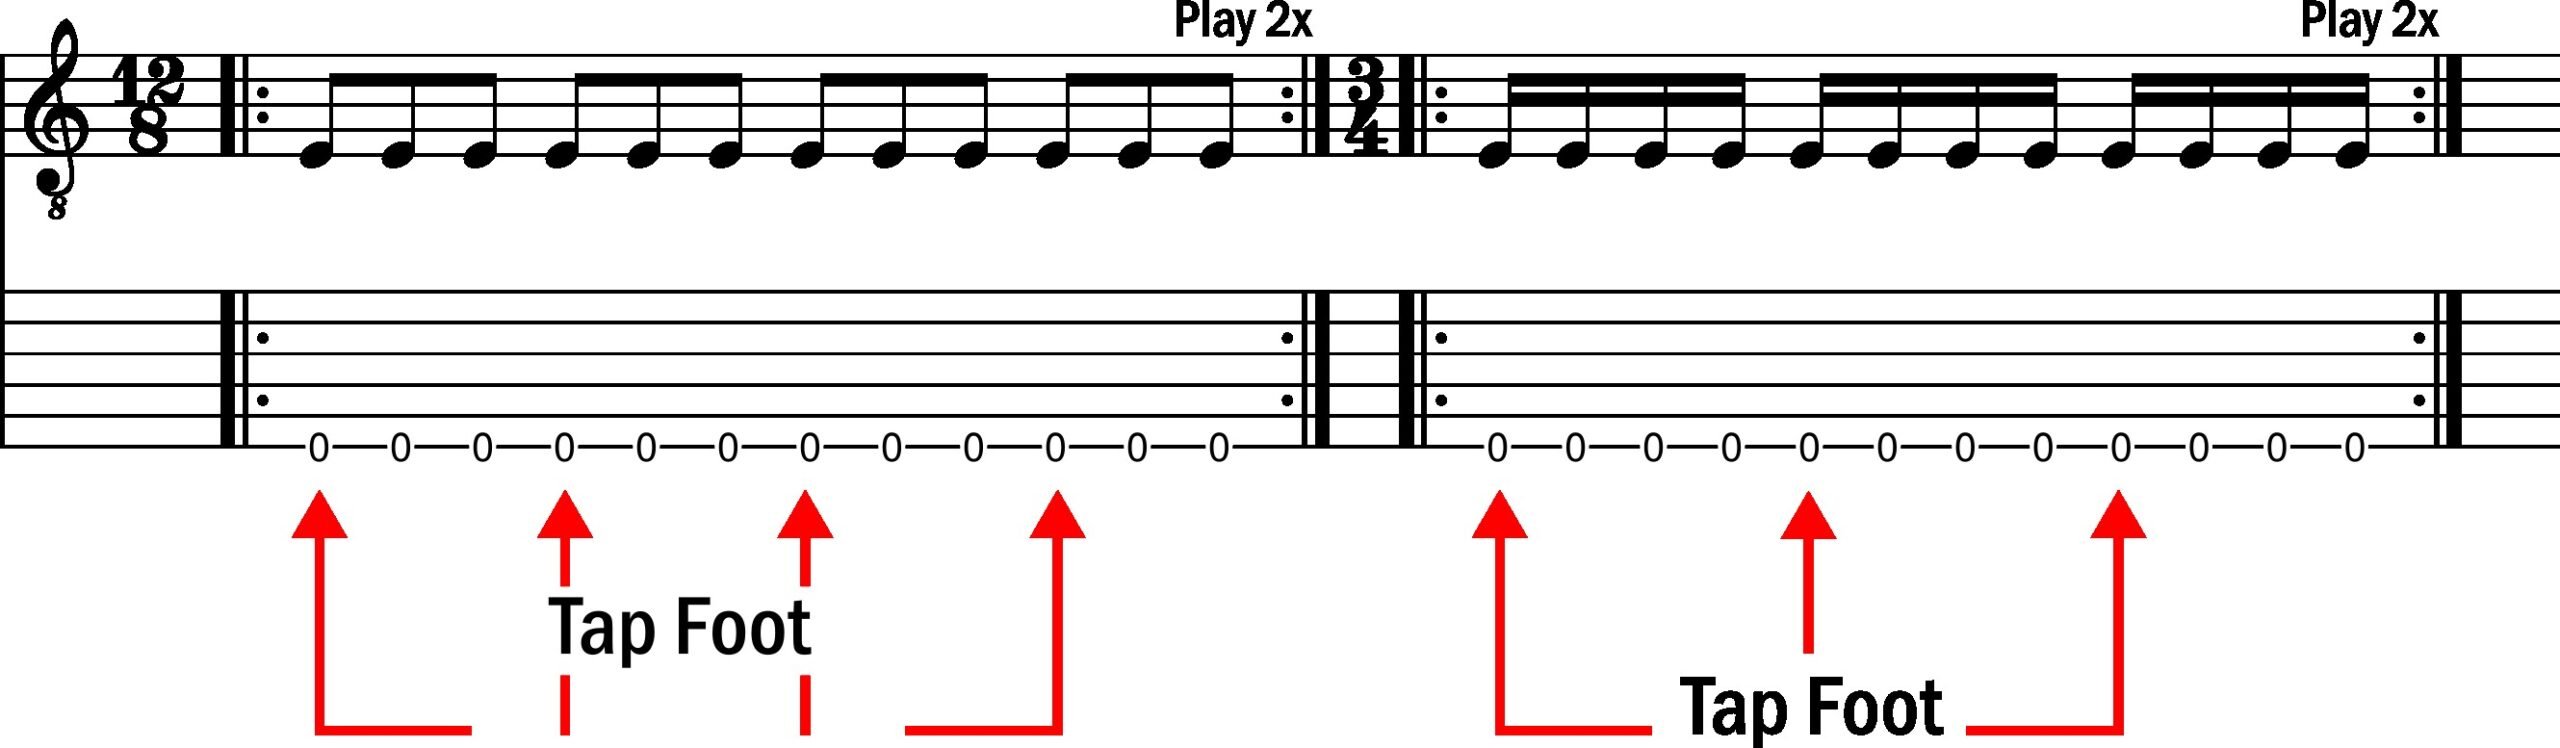
Step 5: Groupings of Three In 12/8 and 3/4
This riff has clear groupings of three. We’ll experiment with feeling it both ways – with our foot tapping every three notes, and also every four.
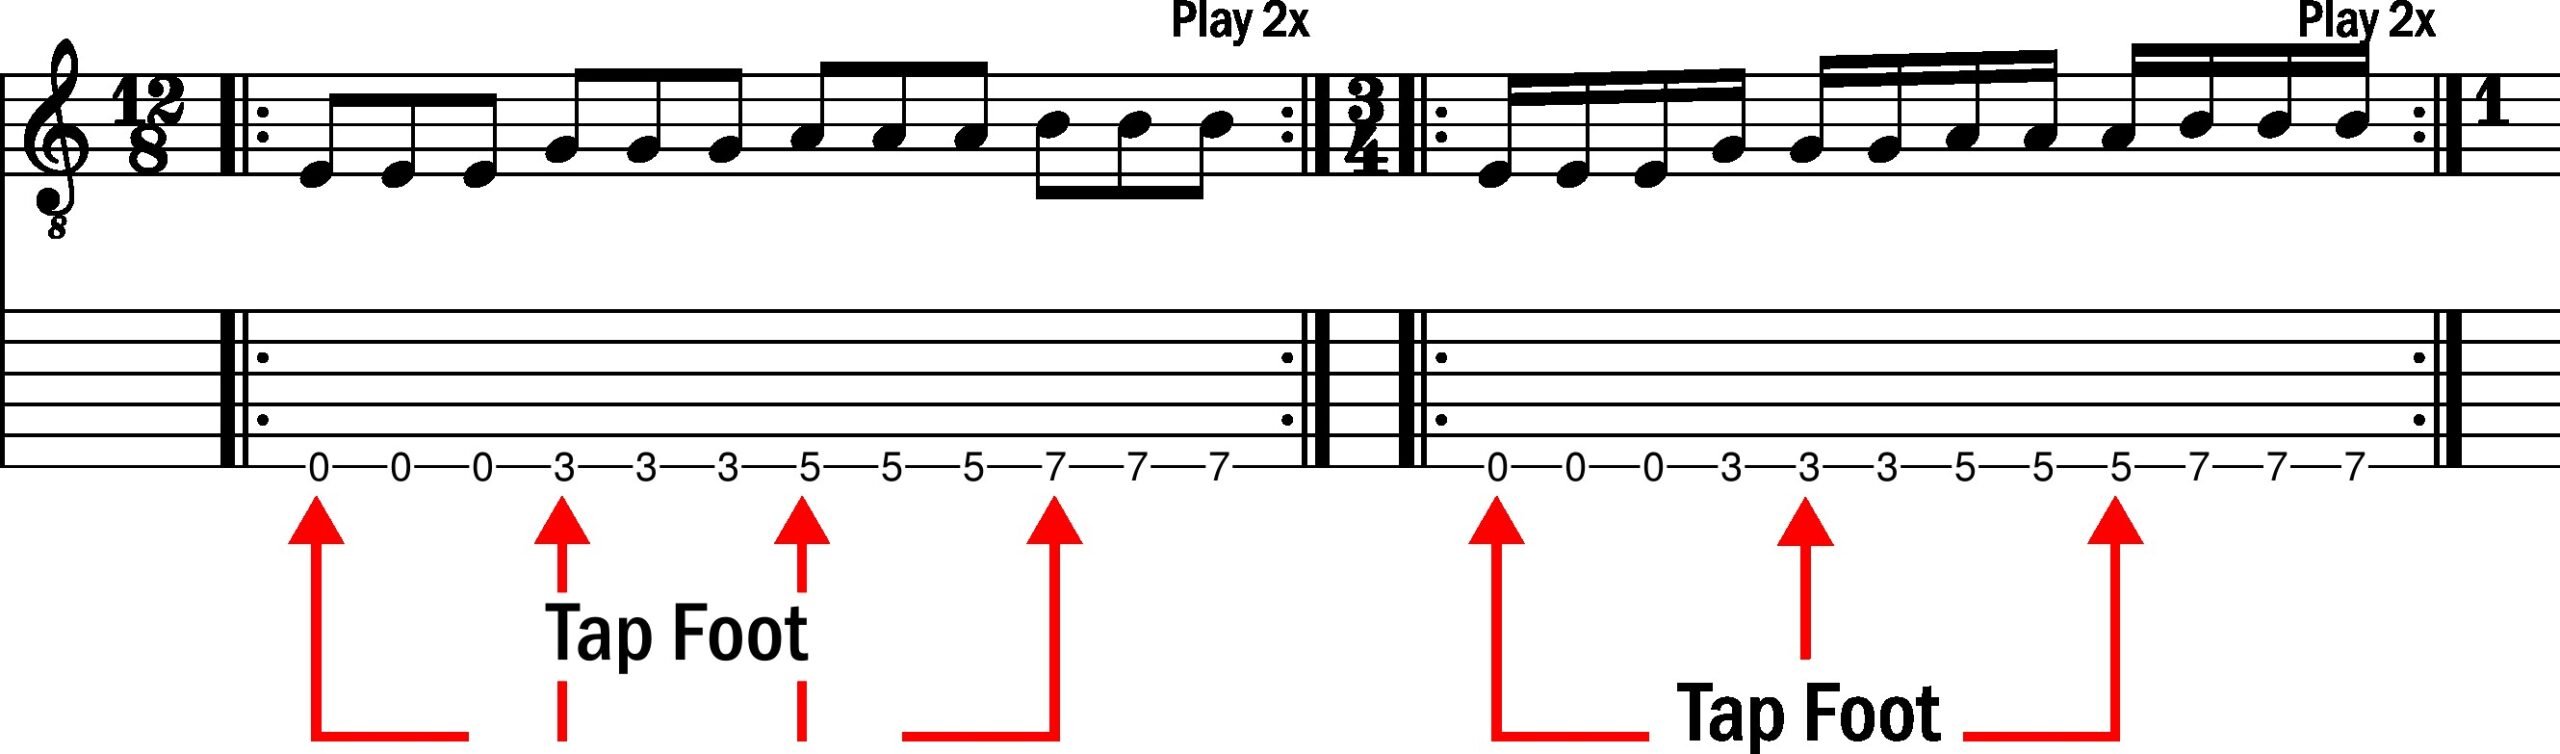
Count out loud “1 – 2 – 3 – 1 – 2 – 3 – 1 – 2 – 3 – 1 – 2 – 3″ while clapping on every “1”. Then switch to clapping every 4th note like this:
“1 – 2 – 3 – 1 – 2 – 3 – 1 – 2 – 3 – 1 – 2 – 3″
Step 6: Groupings of Four in 12/8 and 3/4
This pattern is grouped into fours. Again – tap your foot every three notes, then switch to every four notes.
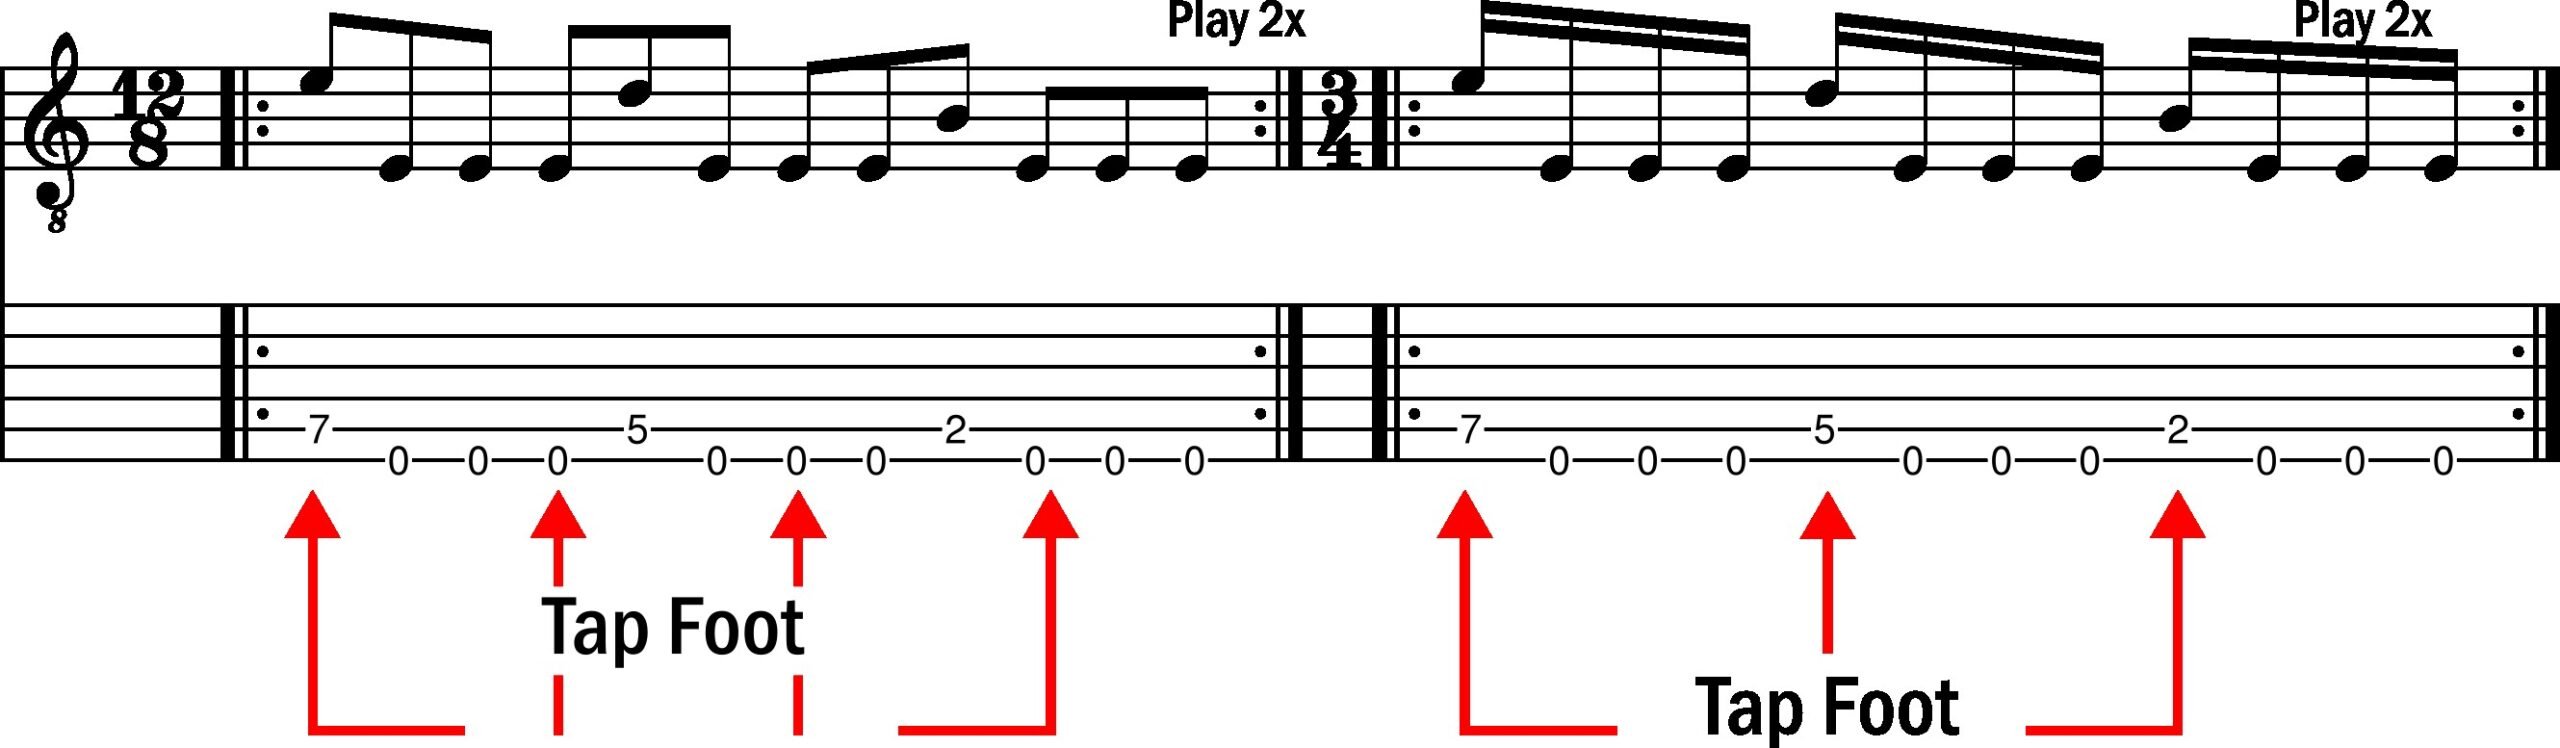
Count out loud “1 – 2 – 3 – 4 – 1 – 2 – 3 – 4 – 1 – 2 – 3 – 4″ while clapping every 1. Then switch to clapping every third note, like this:
“1 – 2 – 3 – 4 – 1 – 2 – 3 – 4 – 1 – 2 – 3 – 4″
What Are We Even Doing?!
What we’re now experiencing is the dualistic world of the 12/8 time signature. It is a versatile framework that can easily accommodate an underlying 3-pulse or a 4-pulse. In some cases, it will even demonstrate both.
Being able to shift from one of these grooves to the other is an important skill if you want to master metric modulation, an advanced rhythmic technique. By keeping a pattern the same but speeding up the underlying pulse, we can change tempos in our song relative to the initial pulse.
Step 7: Add Rhythmic Interest
In all of these examples, we used steady notes for our patterns. Let’s take the same concepts and simply adjust our overall rhythms a bit to make them more interesting.
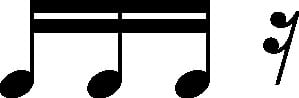
For example, here is a grouping of four, but the fourth note is rested.
Let’s play this pattern three times to produce a riff that is 12 notes long. Then we’ll experiment with tapping our foot on the 3s versus the 4s.
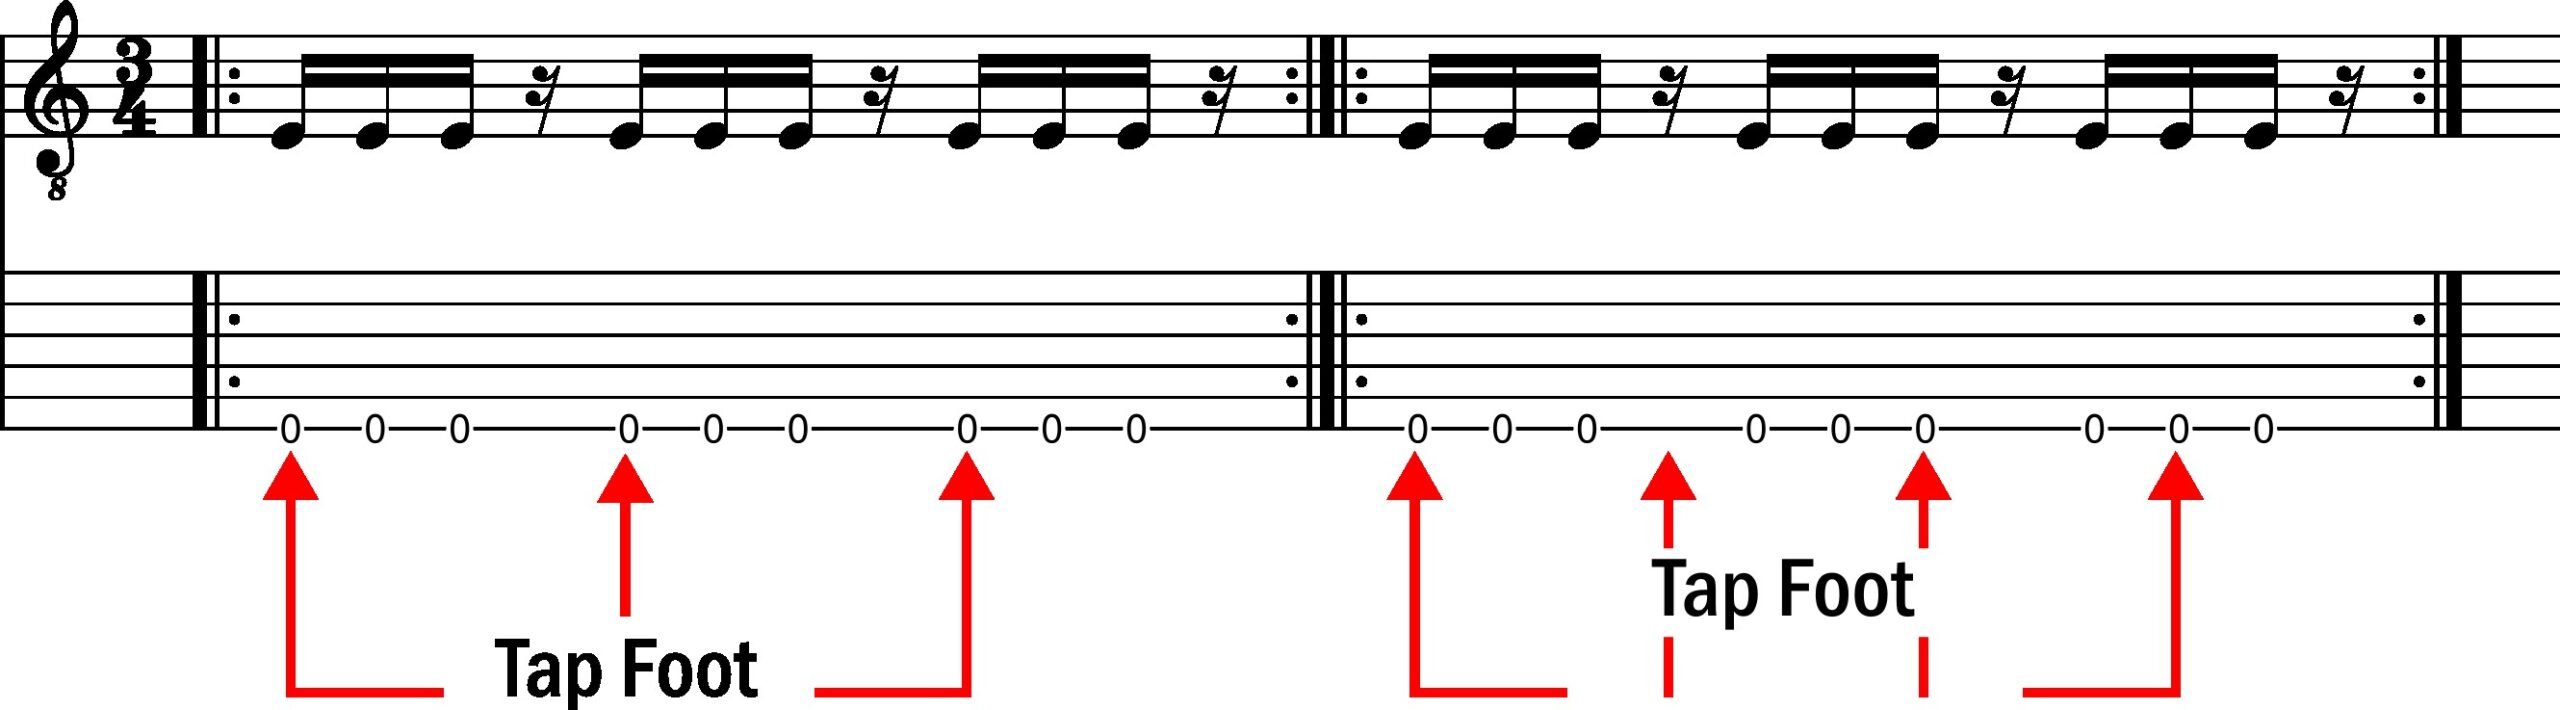
That exact groove is what you’ll hear during the opening moments of “The Mirror” by Dream Theater. Later, another transformation of the same rhythm is performed. It could be written in 12/8, but I’ve opted for the 3/4 time signature instead.
The Next Steps
If you’re looking to expand your rhythmic skills, I can suggest the following videos and lessons I’ve made. They should compliment this lesson well.
Polymeter
Polymeter (lesson here) is when two different voices or instruments play at the same tempo, but in different metric cycles. For example: your guitar is playing a pattern of 3 quarter notes but your drummer is playing a pattern of 4.
That’s what we’ve been doing in this lesson! Except in lieu of a drummer, we’ve been using a foot.
Truncated Polymeter
A more “digestable” approach to playing complicated polymeter, demonstrated here.
Polyrhythm
If you have mastered polymeter, then polyrhythms will surely follow. These naturally occur when you remove everything but the first note of each polymetric voice. My guide on the topic can be clicking here.
Indian Konnakol
Indian music contains the richest rhythm structures in all the world. This video showcases a “simple” exercise that for Indian music students is considered fundamental, but for most Western musicians will prove a nightmare.
If you liked this lesson and want to improve your rhythm skills on guitar, check out my course Real Rhythm Guitar: Level 1.